My First DriveWorks Solo Project
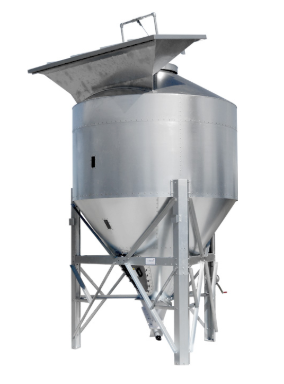
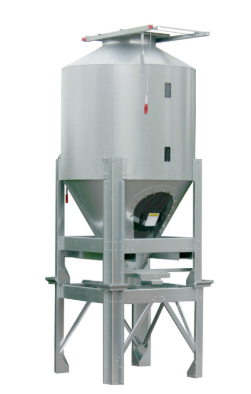
At the start of my placement at DriveWorks I was tasked with creating a configurator for a custom agricultural silo, using DriveWorks Solo inside SOLIDWORKS.
The main thing I learnt from this project is that research and planning is key. The time I spent researching and drawing out my project at the beginning, made it easy to stay on track and create a clear, easy to use configurator.
I’ve summarized what I did and how I did it in this blog post.

Tom
Product Design Placement Student at DriveWorks.
Where to Start
Before getting stuck into my project, I knew it was important to plan out how I would achieve my end goal. This involved research to determine what factors of the silo would need to be configurable.
Of course, I started online by googling custom silo and looked at several websites that showed lots of agricultural equipment. I wanted to get an insight on the use, shapes, functionality, terminology and what people look for when buying a silo.
I discovered there were several features to include when specifying a silo.
These were filler styles, dispenser styles and the overall silo volume requirements – all of which depended on what would be stored in the silo.
Once I knew what features and options I wanted to include in my configurator, it was then important to think about how I would design it, and how I would set it up in SOLIDWORKS.

Modelling for Design Reuse
I had used SOLIDWORKS on my product design course and come across configurations and design tables when using SOLIDWORKS. However, when I’d been through my DriveWorks Solo training, I’d learnt that using rules to drive the design, and drive the SOLIDWORKS outputs, means you can create something that is scalable and automate the design process.
Thanks to the training, I knew how important it was to model for design reuse and change. Before creating anything in SOLIDWORKS I thought about how DriveWorks would automate the models, to ensure that when I started creating the models, they would easily be driven by DriveWorks.
Having completed the DriveWorks Solo training and knowing the best techniques for driving SOLIDWORKS models efficiently, I could narrow down my design scope so I was able to produce effective, realistic models that could be easily automated with DriveWorks.
Project Plan
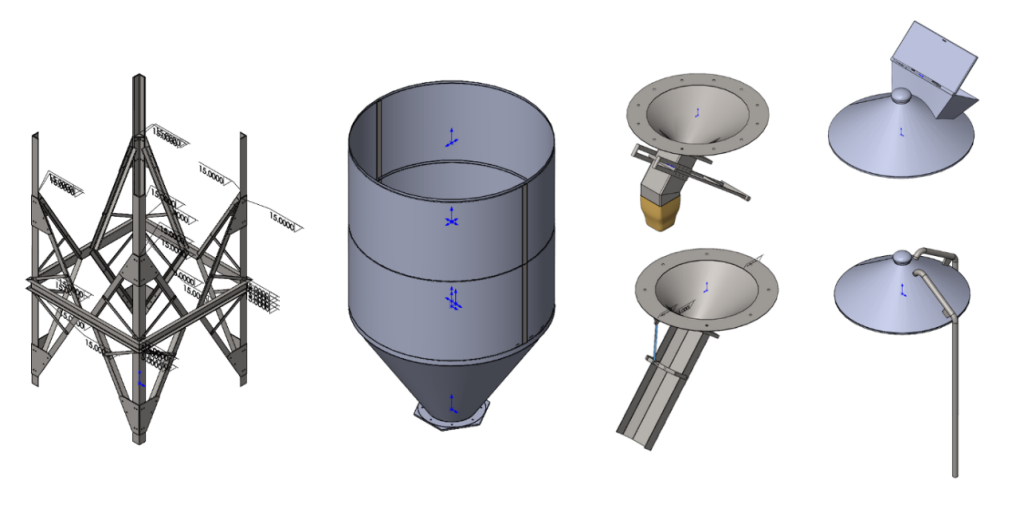
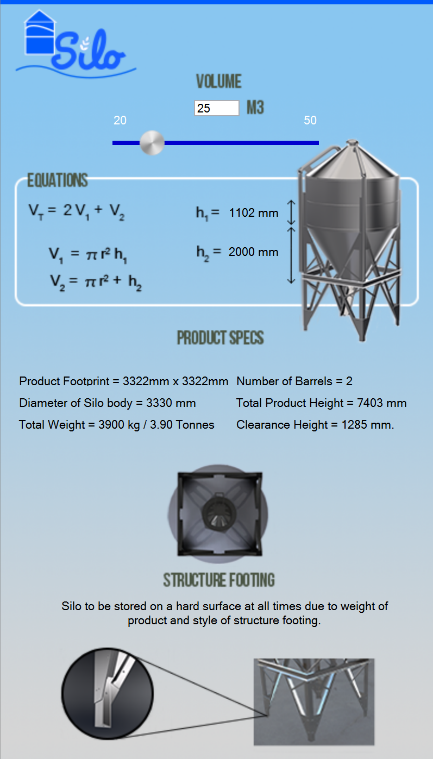
Using my gained DriveWorks knowledge, it was logical to split my SOLIDWORKS models into 3 sections, top (filler), mid-section and bottom (dispenser) and then swap the top and bottom in as instances.
To drive the volume of the silo I decided to capture the height of the mid-section and create a rule in DriveWorks using different mathematical formulas to say that at the specified volume chosen, the height of the mid-section would change by ‘X’ mm.
This chosen method proved a lot easier than trying to drive the volume of the cylindrical sections themselves.
I also created a support structure that would stay constant throughout, to make automation easier.
With all this insight and a plan laid out, I was able to move on to creating the parts in SOLIDWORKS.
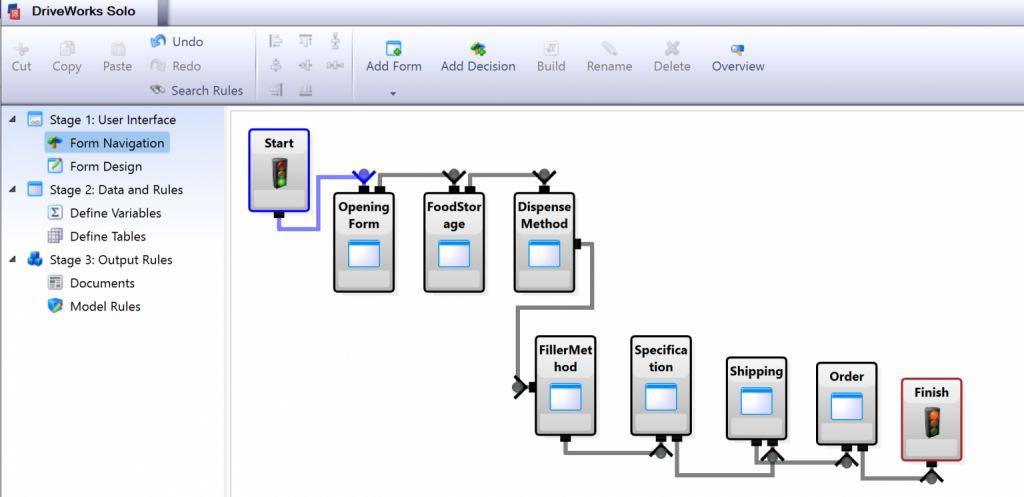
Form Navigation
After going through Sheet Metal and Weldment SOLIDWORKS Manuals and working with the more experienced members in our Technical Team, I was able to create a realistic master model and the individual parts that would be driven in and out of the assembly.
I then started planning the flow for the configurator and what I would show on each form.
I started sketching out ideas and began designing the forms using the DriveWorks Solo form designer so that they would be clear, engaging and easy to navigate.
I took inspiration from some of the other sample configurators on the DriveWorks Live website.
Within DriveWorks Solo I then created a start form, central forms for configuring the silo and then a summary and order form to show the details that the user has chosen.
Creating a Clear UI
Less is often more with UI, so by combining checkboxes and pictures and by keeping a consistent layout throughout, I made the user experience more obvious and quicker to click through.
I added small descriptions highlighting available options or showing error messages and these made the configurator more intuitive.
As DriveWorks Solo includes a powerful rules engine (based on excel style syntax), I then linked all the checkboxes and other controls to the relevant captured SOLIDWORKS models using rules.
Finally, I created a mathematical rule to link the volume textbox/slider to the silo mid-section height and used a dropdown linked to a table to drive the silo colour.
Timescale
In addition to this configurator project, I had several other projects I needed to work on during my internship, but I would say that overall it took me 2 months of elapsed time to get from planning the project to the finished goal.
I spent a week planning, 3 weeks creating all the models, 2 weeks creating the DriveWorks project and another 2 weeks enhancing it and finalising it based on testing and feedback.
Download and Try the Silo Project
I’m really pleased with the end result and super happy that it’s now featured on the DriveWorks Solo website for anyone to download and try for themselves whilst I’m back at university.
There are many other DriveWorks Solo sample projects on the website too, showing lots of different ways DriveWorks Solo can be set up and used.
I also created a video showing the features of the Agricultural Silo project and you can find many more like it on the DriveWorks YouTube channel.
Try DriveWorks Solo
Download and use DriveWorks Solo free for 30 days with the DriveWorks Solo 30 Day Free Trial.
Available to anyone with SOLIDWORKS.