Before capturing your Master Model’s Assembly Structure inside DriveWorks, you need to decide which components need to be captured, and how to capture them.
The first question you should ask is, do any new models need to be created based on this component?
If they do, and Dimensions or Features need driving, they should be captured as a component. This will allow you to go on and capture Dimensions, Features, Custom Properties, and Drawings against the component.
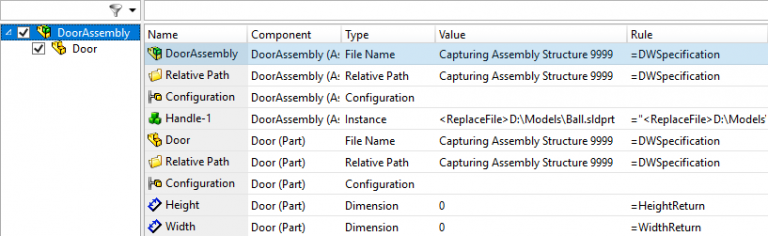
You can then build rules for these captured elements inside your project’s Model Rules.
The next question to consider is, does the component need to be swapped for another, or have its configurations changed in the generated Assembly?
If the answer is yes, capturing the component as an Instance will mean you can build Rules that allow the component to be swapped, and have its configuration driven.
If a component doesn’t change, you don’t need to capture it at all. The component that exists in the master assembly will continue to be referenced by any generated assemblies.
Here is an example in practice:
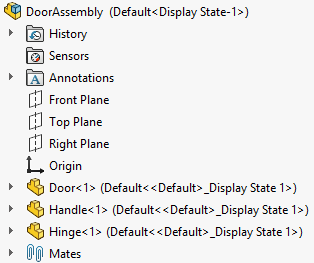
Inside SOLIDWORKS we have an Assembly called DoorAssembly with the Assembly Structure as pictured here.
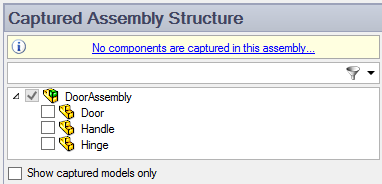
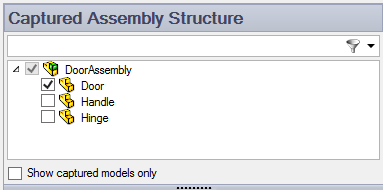
If we capture this Assembly inside DriveWorks Solo, the Captured Assembly Structure tab opens, and we need to decide what to capture inside the Assembly.
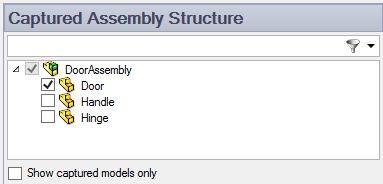
We want to be able to drive the Door Part’s dimensions and generate new files based on a Master Part. This means we need to capture it as a component by checking the associated checkbox.
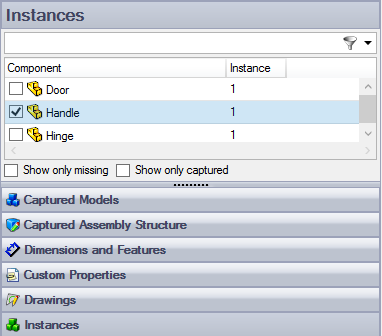
In any new DoorAssembly files that we create using DriveWorks, we don’t want new Handle Parts to be created. However, we do want to be able to swap in existing Parts from a library. To do this, we can choose to capture the Handle Part as an Instance.
With the DoorAssembly open, clicking on the Instances tab will show all the components that can be captured as Instances, clicking on the checkbox next to the Handle component will capture it as an Instance.
The final component to consider is the Hinge. We can leave this uncaptured as the component can’t change. The Hinge Part being referenced by the Master DoorAssembly will continue to be referenced by any generated DoorAssembly Models. You won’t need to build any Rules for the Hinge Part and running the Project won’t generate any new Hinge Parts.
Inside your Project’s Model Rules, swap the Handle Part for a different SOLIDWORKS Model and reference the existing Hinge Part in any generated models. This will allow you to create a new version of the DoorAssembly and Door Part.
Learn more about Captured Assembly Structure in our online help file