Products & Solutions
Why DriveWorks
How to Buy
Resources
About
Log InTry Demos

Rademaker have over 40 years of experience in providing solutions for the food processing industry. Their broad portfolio of production lines include: bread, laminated dough, croissants, pastry, pies and pizza.

The Rademaker brand is well known across the globe for their knowledge and experience in automation, engineering and hygiene.

Designing to Order Before DriveWorks

In 2003, Rademaker started modelling their machinery in 3D using SOLIDWORKS. Over time, they developed several processes to quickly create 3D models in SOLIDWORKS that were ready for production and contained a high level of standardization and modularization.

However, the engineering time required to complete the process was substantial. An engineer would need to complete several manual actions to obtain a correct 3D model and a drawing ready for production.

Zero Effort Engineering

Rademaker wanted to implement a ‘Zero Effort Engineering’ (ZEE) process that would reduce the engineering time required.

A ZEE process means that the engineer would only need to fill in the specifications of a machine and the 3D models, drawings and bill of materials would be automatically generated and released to SAP-PLM.

Another objective for Rademaker was to have the ability to reuse generated ‘standard’ parts to gain a more efficient production process and a higher level of quality.

Implementing DriveWorks

After examining all the possibilities to achieve ZEE, DriveWorks was the perfect tool for Rademaker. The software helps them to meet their demands, obtain a high level of modularization and reduce time in several divisions across their organization.

Rademaker have also integrated DriveWorks with SAP-PLM. By using a DriveWorks project per part/assembly, they’re able to reuse parts and sub-assemblies. This facilitates the process of standardization, change control, logistics and sales.

Achieving Targets

Rademaker’s target was to reduce engineering time to less than 15 minutes for modular units. This target has been achieved with DriveWorks.

They also achieved a 30% reduction in time during the standardization process as DriveWorks enabled them to optimize their way of working with product structures. They’ve increased flexibility, variants, functionality and the number of options they can handle.

For more information about Rademaker, visit: www.rademaker.com

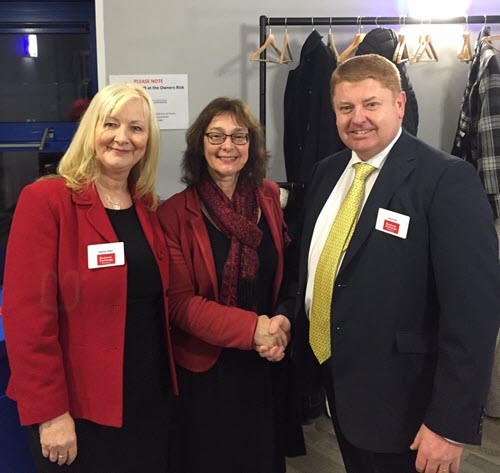
Last week Maria, VP of DriveWorks, attended the launch event of the Warrington Business Exchange (WBEx) and we’re proud to announce that we’re now members of this great networking initiative.

WBEx is the place for businesses to collaborate, resulting in a better a connected and stronger economy in Warrington.

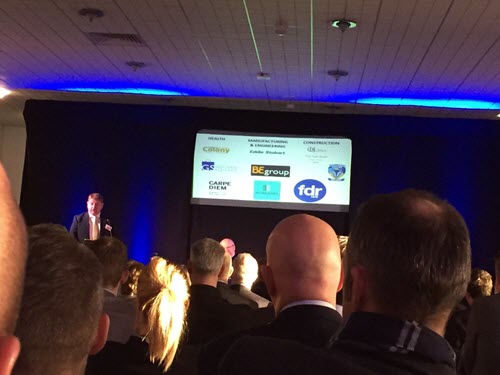
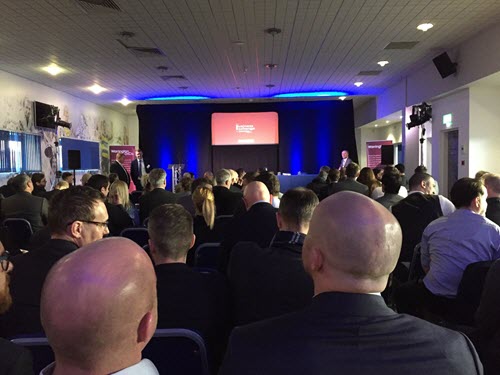
The fantastic launch event gathered together members from across Warrington’s entire business sector, including members from multinationals to sole trader micro businesses. It sold out in just 5 days and 280 businesses registered to attend!

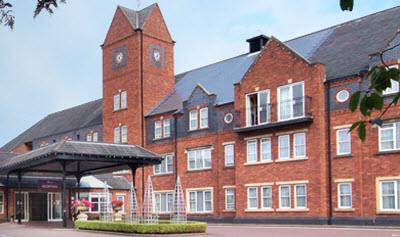
Steve Park, the Managing Director of WBEx, kicked off the meeting by welcoming attendees and discussing the benefits that the Warrington Business Exchange will provide. Next was a great speaker panel that included Dave Pickering of Eddie Stobart, Mike Lomax of Total Steel and Annie Brown of the Park Royal Hotel.

It was fantastic to see how many local businesses have joined the group, particularly from the Manufacturing and Engineering sector, and have the opportunity to learn more about them.

During the event, Maria spoke to Emma Short from Hand on Heart, an organization who’s mission is to raise awareness of cardiac arrest in young people and the need for defibrillators in schools.

It was really inspiring to hear about the great work they’re doing and Maria was happy to tell Emma about our own fundraising initiative for a public access defibrillator for our local community. Speaking to Emma really reinforced the fact that defibrillators can help to save lives and it made us even more determined to reach our goal.

We’re looking forward to the next WBEx networking event, watch this space for updates!

DriveWorks’ VP, Maria Sarkar, with Steve Park, Managing Director of WBEx and Kathryn Green also of the Business Exchange.

Great Software is Not The Only Thing Our Developers Can Create…

Back in December, we blogged about the DriveWorks Christmas party where we put our project management skills to the test and organised a weekend of celebrations.

Ben, a Software Developer here at DriveWorks has been a huge fan of craft beer for a very long time, he even brewed beer for all of the guests at his wedding!

Of course, Ben was keen to be part of the bar team and got stuck in straight away, brewing a beer to share with us all at our Christmas celebration.

And so, Automation IPA was born!

After we posted our blog, quite a few of you got in touch with us to say how much you would like to try Automation IPA. Unfortunately, it was a great party so none of the bottles of Automation IPA made it home with us…

However, Ben has been busy crafting two more batches of Automation IPA! The first batch is now brewing and we’re going to be serving it on Tuesday night at DriveWorks World 2018.

Here’s Ben’s brewing process so far…

Step 1: Preparing the Water

14 litres of water added to the kettle, heated to around 73°C.

A Campden tablet is added to drive off any unwanted chlorine and kill off any natural/wild yeasts.

Gypsum, chalk, Epsom salt and table salt are added next.

Ben’s Beer Brewing Tip:

As beer is 95%+ water and not all water is the same (i.e. different mineral contents depending on where you live, whether it’s hard or soft etc), it’s worth spending some time making sure that the water tastes good and is optimum for the yeast to work its magic in.

I adjusted my home water supply to match a water profile that is better at enhancing hop aromas so it would be suited to this style of beer.

The amounts used are specific to my water supply which I determine from a water treatment spreadsheet.

Step 2: Weighing Out the Malts

All the unweighed malts and hops

110g Cara Pils Malt

180g Crystal Malt

350g Munich Malt

750g Golden Primrose Pale Ale Malt

3.25kg Maris Otter Malt

Ben’s Beer Brewing Tip:

Each malt has its own taste, sugar content and colour – hence I’ve used a combination of 5 different types.

The Maris Otter Malt is our base malt (which could be substituted for American two-row) and that’s used for its sugar content. Golden Promise should add some sweetness, Crystal Malt adds sweetness and colour. The Cara Pils helps the beer retain a frothy head, and improves the beer’s mouthfeel and body.

Step 3: Mashing In

The heated water, known as Strike Water, is transferred to the Mash or Lauter Tun.

The ‘Mashing In’ starts, the grains are added to the hot water to extract the sugars from the grain, known as ‘grist’.

The temperature drops a little when adding the cold grain to the hot water. The temperature is checked to make sure it is still within an acceptable range.

Ben’s Beer Brewing Tip:

Different temperatures at this stage change the way that the grains release their sugars. As a general rule, higher temperatures result in less fermentable sugars, therefore sweeter beer.

The hot water/malt now sits for 75 mins, known as The ‘Saccharification Rest’.

Step 4: Sparging

Meanwhile, a 20L batch of water, known as ‘Sparge Water’ is prepped.

Again this water is treated for taste and this time the PH levels are also checked.
The PH level of the ‘wort’, the sugary water that comes from the grain mix, is also checked.
A couple of ml of Lactic Acid is then added to the sparge water.

Ben’s Beer Brewing Tip:

Notice the DriveWorks mug – don’t brew without a ‘brew’!

The wort is drained from the mash tun, the first few litres are recirculated (a process known as ‘varlaufing’) to help keep small bits of grain that get through the filters in the mash tun and out of the wort.

The ‘first runnings’ are drained into a bucket – these will get transferred back to the kettle shortly.

The ‘sparge water’ (at 76°C) is poured through to wash any remaining sugars from the damp grain, known as ‘sparging’.

The sparge water flows straight through the grain – you’ll notice that the colour of the liquid exiting is much lighter than in the previous pictures as there are fewer sugars in it.

The running’s from the mash tun are then returned to the kettle.

A sample of the wort is taken to measure the viscosity.

The thick sugary water makes the hydrometer float higher in the liquid and gives a pre-boil gravity reading of 1.036.

Step 5: Adding the Hops

First, the hops are all measured out. Some of the hops are added twice at different times and in different quantities. Magnum is our bittering hop, Centennial and Simcoe are the aroma hops, we’ll then dry hop towards the end of fermentation with Citra and additional Simcoe.

Once the pot is boiling another 75-minute timer is started.

Magnum bittering hops are added straight away and stay in the beer for the next couple of hours.

The hops were vacuum packed before and expand when they get wet – usually, they get broken up but one managed to stay whole!

The other hop additions are as follows:

  • 20g Magnum at 75 minutes remaining
  • 10g Centennial at 10 mins remaining
  • 5g Simcoe at 10 mins remaining
  • 15g Centennial at 5 mins remaining
  • 10g Simcoe at 5 mins remaining

Step 6: The Cooling Process

Whoops – it’s a bit steamy, best open a window and a door!

The cooling coil, which Ben made from a length of copper and hose piping, gets added to the boiling wort about 15 minutes before the temperature is changed to make sure that it is sterile.

After a total of 75 mins the kettle is turned off and cold water is passed through the coil to drop the temperature.

When it reaches 80°C the cold water is turned off and two more lots of hops are added (25g Centennial and 15g Simcoe). They steep for 15 minutes at 80°C. After 15 mins steeping, the wort is dropped to below 30°C.

Step 7: Adding Yeast

The US-05 Yeast strain is dried inside the packet so warm water is added to re-hydrate it.

After cooling, the wort is transferred to a fermenter.

It falls from a height to allow a bit of oxygen to be absorbed by the liquid as this helps the yeast in its first few days.

Another gravity reading is taken, there’s now less water in it as its been boiled off so our ‘Starting Gravity’ or more commonly referred to ‘SG’ is 1.045.

The yeast is then added to the cool wort.

Step 8: Storage, Fermentation and Automation

The lid goes on the fermenter, an airlock is added to allow carbon dioxide gas to escape but to prevent oxygen from entering, and the bucket goes in Ben’s temperature controlled fridge.

You can see one temperature probe on top and another taped to the right hand side. At the bottom is a heater so the fridge is able to heat as well as cool the contents.

It will take about 10 days to ferment, converting the sugars to alcohol and in about 8 days the dry hops will be added.

At the end, the ‘Final Gravity’ (FG) reading is taken. Ben is expecting an ‘FG’ of 1.008. The difference between the two gravity readings tells us how much sugar has been consumed by the yeast and in turn, the alcohol content can be calculated (estimated currently at 4.8%).

Once its finished fermenting, the fridge will cool the beer to 3-4°C, which will help any hop and yeast residue fall out of suspension, and it will be transferred into a keg and carbonated in time for DriveWorks World 2018!

Of course Ben has automated the next steps of the brewing process.

Ben simply puts the beer in the fridge, lets’ the fridge know it has started and the rest happens automatically.

The fridge alternates between heating and cooling to maintain a steady beer temperature. The fridge automatically turns on if the beer is too hot, the heater turns on if it’s too cold and sits idle if the temperature is between 0.2-0.3°C.

It’s also been set to automatically raise the temperature incrementally as it approaches the end of fermentation to help the yeast finish.

After 7 days at 18°C, the fridge knows to automatically increment to 20°C over the space of a few hours, sit at that temperature for a day or two and then quite rapidly cool the beer down to around 4°C.

The dashboard that monitors the fridge has been added to the screens in our office so we can all keep track of the brewing process!

Look out for more updates from Ben about the progress of Automation IPA, coming soon on our blog!

There are so many reasons to attend DriveWorks World, our annual technical user training event, Automation IPA is just one of them!

What are you waiting for? Secure your place now at www.driveworksworld.com

DriveWorks World will be held in Cheshire, UK from April 16th-18th. It’s your chance to learn, network, be inspired and see what’s new in the latest release of DriveWorks.

Don’t miss out, registration closes on March 23rd!

DriveWorks World is a technically focused, value-added event for DriveWorks customers, with an active subscription support contract, as well as our reseller Applications Engineers.

The event will be held at the Park Royal Hotel, from the 16th – 18th of April 2018. Join us for your opportunity to discover, network and be inspired!

Registration Closes

23rd March

Register now so you don’t miss out!

6 Reasons to Attend

There will be something of interest and value to you, whether you are new to DriveWorks, or are an advanced user of the software. DriveWorks World is your chance to learn, network & share ideas with DriveWorks experts & enthusiasts.

1. Learn

Advance your knowledge, talk to DriveWorks experts and learn from other users about the way they do things. Pick up best practices, tips and tricks that will improve the way you work.

2. Meet

Meet the DriveWorks team, tell us about your projects, how you use DriveWorks, your plans for advancing your projects and how we can help you to work smarter.

3. Choose Your Sessions

Tailor your DriveWorks World experience by choosing sessions to suit you and your skill level. Either complete the DriveWorks Pro Training and Certification or go beyond that with topics to advance your knowledge.

4. What’s New

Be amongst the first to see and use DriveWorks 16. Learn from DriveWorks experts how to use the new functionality and features and see how you can make the most of the new release.

5. Influence

Share your opinions and ideas about DriveWorks to influence the future of our software releases. Exchange experiences and discuss trends with other DriveWorks users to enhance your projects and help others to improve theirs.

6. Get Certified

Take our instructor led training from DriveWorks experts and gain Certified DriveWorks Professional (CDWP) status. DriveWorks World is the only opportunity for DriveWorks users to become a CDWP.

Signing Up and Booking your Accomodation

Head to www.driveworksworld.com to find out more and secure your place.

Due to high demand, there are a limited number of rooms left at the Park Royal Hotel. Book now to secure your room!

Get in touch if you have any questions, you can email events@driveworks.co.uk or call us on +44 1925 757585.

Automate SOLIDWORKS with DriveWorks Solo and save $3600 when you buy 3 licenses.

Create and configure custom products inside SOLIDWORKS® quickly and easily with DriveWorks Solo

Use DriveWorks Solo to reduce the cost of custom designs, respond quickly to sales inquiries, enhance product quality and reduce repetitive tasks.

Setup and use DriveWorks Solo in the engineering department to generate the 3D designs, detailed manufacturing drawings and quotes for each new order-specific design.

See if DriveWorks Solo is right for you with our 30 Day Free Trial!

Set Up Once, Run Again and Again

A DriveWorks Solo design automation project is easy to set up, easy to manage, and easy to use. By following these four easy steps, you can set up and then run a project as many times as you like.

Fill out the form with your customer’s specifications, and quickly generate multiple new versions of your designs along with any manufacturing or sales documentation.

Helping You to Help Yourself

Getting started with DriveWorks Solo is easy and we provide learning resources to make it even easier. Get the most out of your project with the handy resources below.

Help File

Find information, best practices and solutions quickly and easily.
Available online, whenever you need it.

Online Help

How to Videos

Watch a selection of short video clips to learn how to use DriveWorks Solo. Learn at a time that suits you and at your own pace.

Watch

Sample Projects

Download and explore complete DriveWorks Solo projects. See a range of industry examples and learn how they are set up.

Download

Webinars

Join our Getting Started and Online Training webinars to learn from a DriveWorks expert, pick up tips and tricks and ask questions.

Register

Save $3600 with Our 3 for 2 Offer

Between March 15th and April 30th 2018, we’re offering 3 for 2 on licenses of DriveWorks Solo so you can save $3600 when you buy 3 licenses.

To claim this offer simply email us. We’ll provide you with a voucher code that you can take to your reseller when you purchase DriveWork Solo before April 30th.